

In my last blog I introduced the new Jamf Pro integration with Microsoft EMS. In this blog I would like to dive into the configuration of the integration and show you the experience. Setting it up is pretty straightforward and easy. To be able to integrate the two services, we need to:
- configure an Azure AD App
- enable the integration in Intune
- enable the integration in Jamf Pro
Configure the Azure AD App
First, we need to configure the Azure AD app in https://portal.azure.com
- Go to Azure Active Directory and click App Registrations
- Click New Application Registration
- Supply a Name, select Web app / API and supply the custom link to your Jamf Pro instance.

- Click Create
- Open the new created app for Jamf Pro and copy the Application ID to notepad.
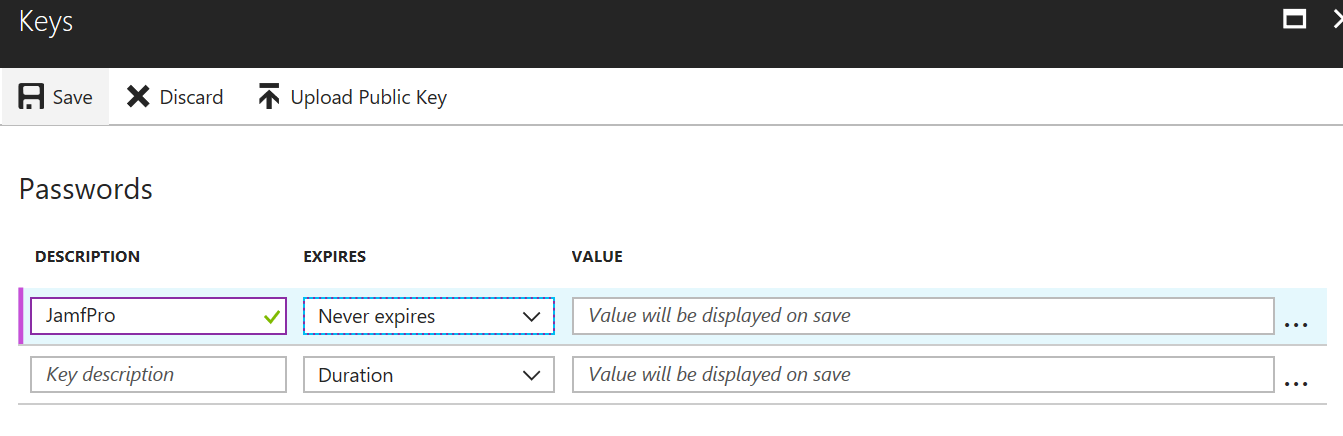
- Go to Keys in Settings.
- Supply a Description and select the Expiry time for when the Application Key needs to expire.

- Click Save and copy the application key before you close the blade, after closing the blade they application key is not available anymore and then you need to create a new application key.
- Still in the App created for Jamf, go to Required Permissions, select Windows Azure Active Directory, click Delete and click Yes.
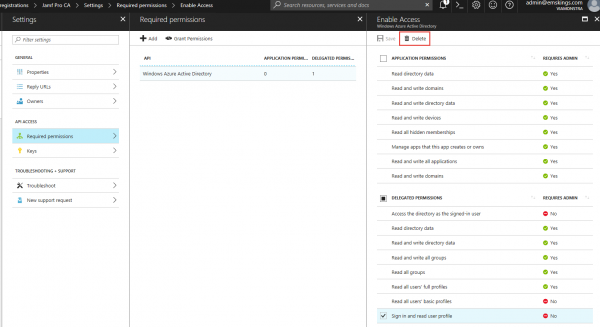
- In the Required permissions pane, click Add.
- Click Select an API, select Microsoft Intune API (MicrosoftIntuneAPI) and click Select.
- Click Select permissions, select Send device attributes to Microsoft Intune and click Select.
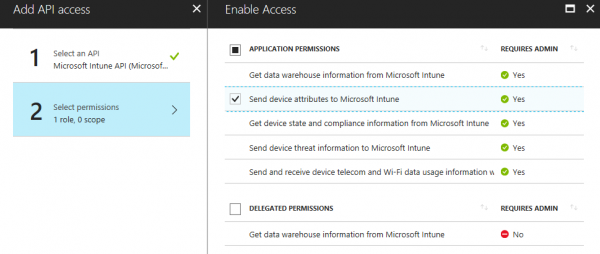
- Click Done.
- Next, click Grant Permissions and Yes to grant the permissions for all accounts.


Enable the integration in Intune
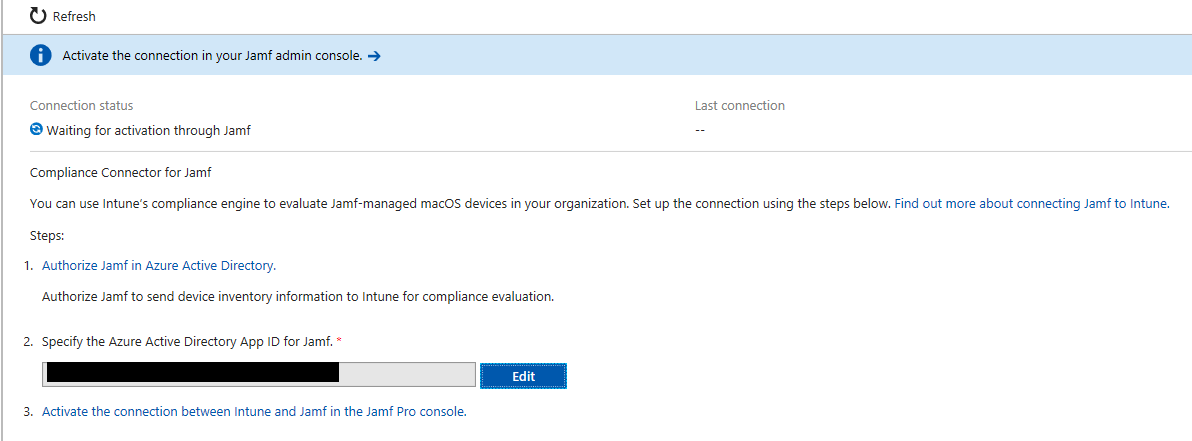
Go to Device compliance, Partner device management in the Intune on Azure portal (https://portal.azure.com) and paste the Application ID you saved in Notepad in the Specify the Azure Active Directory App ID for Jamf field and click Save.
Enable the integration in Jamf Pro
Next we need to go to the customized Jamf Pro admin URL, and login with the Admin credentials.
- In the Jamf Pro admin console, click Wheel and click Global Management.
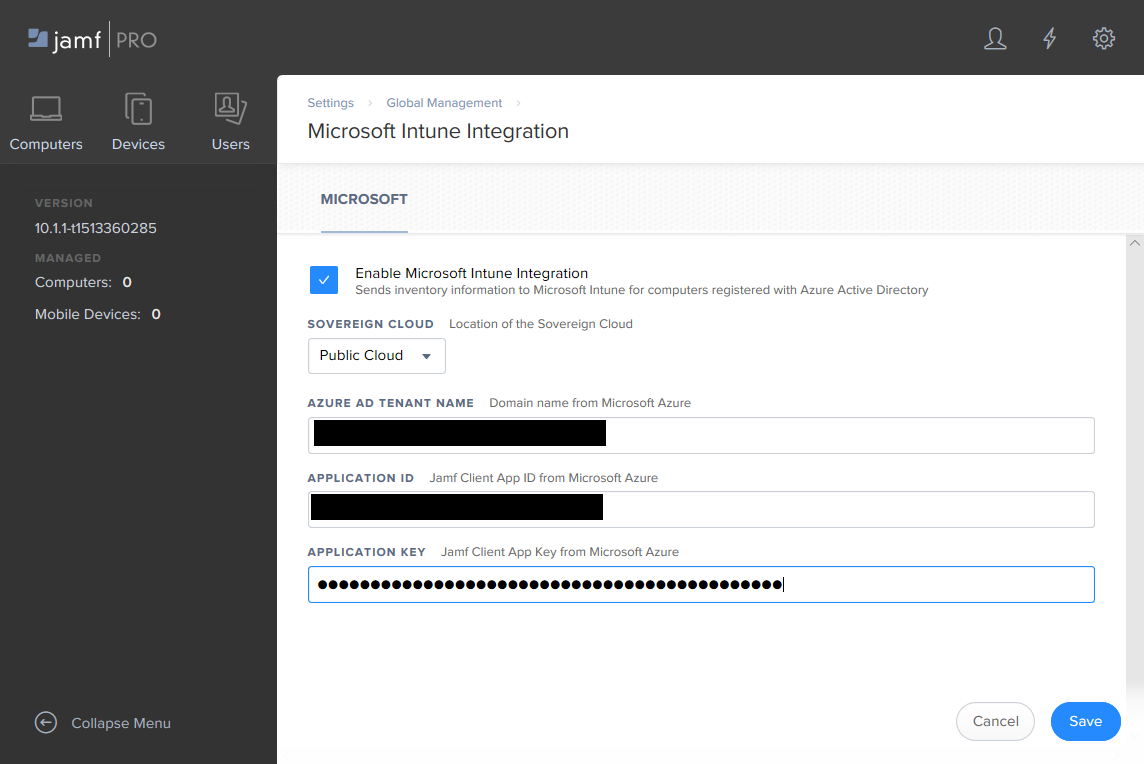
- Click Microsoft Intune Integration and click Edit.
- Click the checkbox next to Enable Microsoft Intune Integration.
- Select Public Cloud as the Sovereign Cloud.
- Supply your Azure AD Tenant ID
- Supply the Application ID
- Supply the Application Key
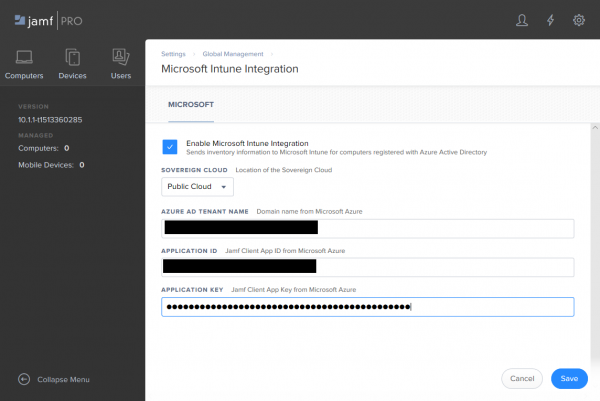
- Click Save
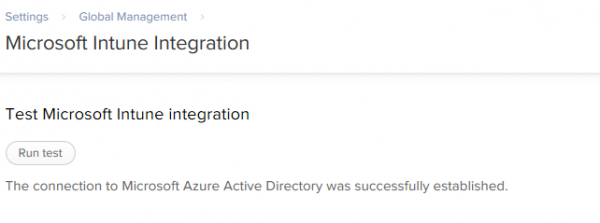
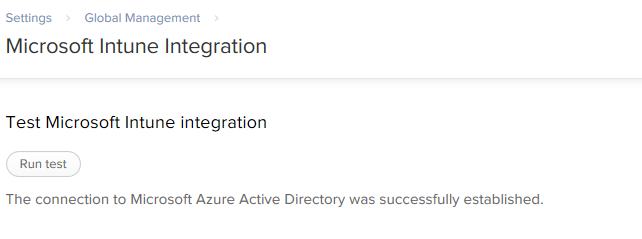
- Click Test and Run test to verify the connection to Azure AD.
- Click Done twice.
- Go back to the Intune on Azure portal and review the connection status in Intune.
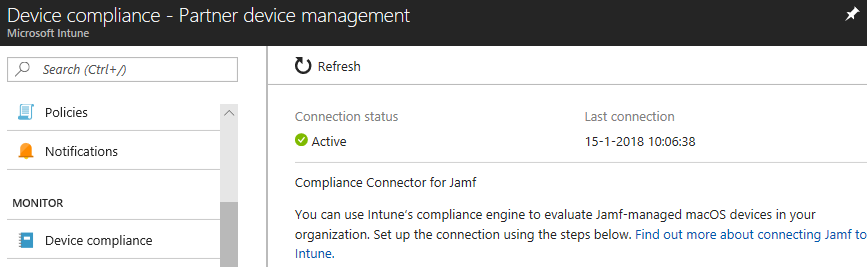
So now that we have setup the connection between Microsoft Intune and Jamf Pro we need to make sure that the macOS devices are registered also with Azure AD and that Microsoft Intune receives the inventory from Jamf Pro. More on this in my last blog about the integration between Jamf Pro and Microsoft Intune.
Read also
- Jamf Pro and Microsoft EMS better together – part 1
- Jamf Pro and Microsoft EMS better together – configuration – part 2 (this blog)
- Jamf Pro and Microsoft EMS better together – macOS devices – part 3