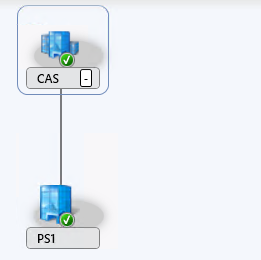
 I think this could be one of the most requested features for Service Pack 1, namely the ability to add a Central Administration Site (CAS) to your Configuration Manager 2012 hierarchy. In my series about the top 10 nicest new features we are going to look how adding a CAS looks like and when you should add a CAS to your hierarchy.
Adding a CAS will be a rare action though, but it is nice that the ability to add a CAS to a stand-alone primary site is added to Configuration Manager 2012 Service Pack 1.
But first before looking at adding a CAS, you should ask yourself if you really need a CAS in your Configuration Manager 2012 environment. A CAS looks cool but be aware that your Configuration Manager environment will be more complex since Database Replication is introduced to replicate the changes between the CAS and the Primary Sites. There are two main rules to keep in mind when planning to extend your hierarchy:
- Use a CAS when you need support for more than 100.000 clients.
- Use a CAS when you need more than one Primary Site due to political reasons.
and
- Adding a CAS cannot be used for merging two Configuration Manager environments. In SP1 you are able to use the Migration Feature that is able to migrate objects from one Configuration Manager 2012 SP1 environment to another Configuration Manager 2012 SP1 environment.
- After you install
Most companies won’t be needing a CAS but if you really need one and you have chosen to install a Configuration Manager 2012 RTM Primary Site you are with SP1 able to add a CAS “above” the current primary site.
Before you are able to add a CAS to a standalone Primary Site you need to apply to the following prerequisites:
- Both the stand-alone primary site and the central administration site (to be) needs to run the same version of Configuration Manager 2012 SP1.
- Computer account of the CAS (to be) needs to be added to the local administrators group of the stand-alone primary site server.
- Stop the data gathering process of the migration feature.
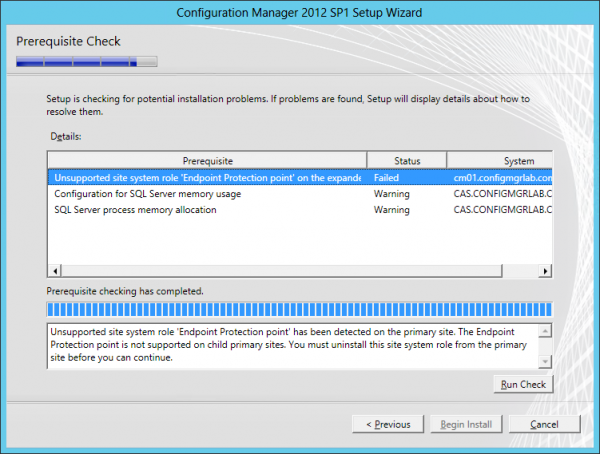
- Uninstall the Endpoint Protection Point and Asset intelligence synchronization point site roles on the stand-alone primary site server.
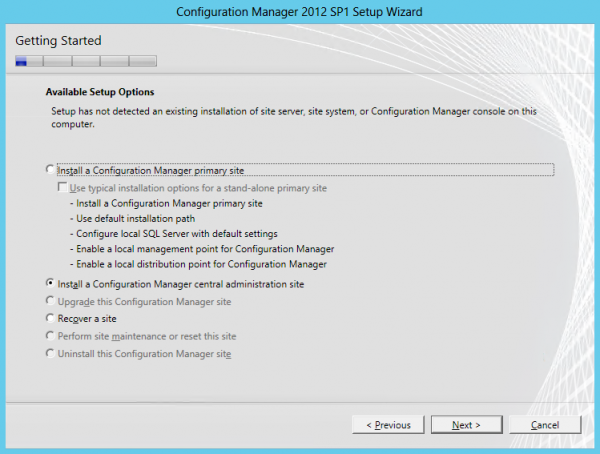
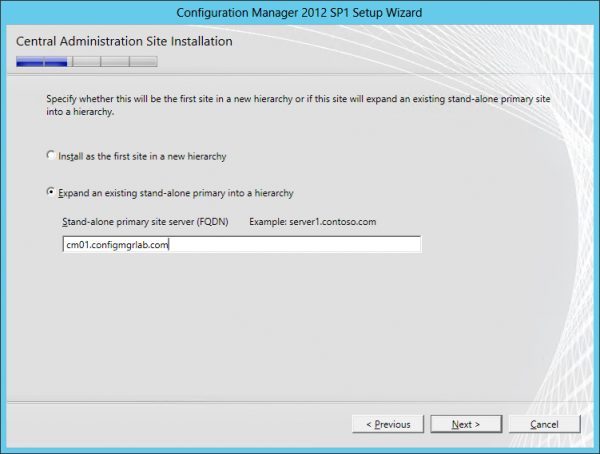
After selecting the option Install a Configuration Manager Central Administration Site you need to select the languages that you want to support. (If you add more languages, be sure to add them also on the Primary Site. Not required but is a best practice J ) Next you need to choose to Expand an existing stand-alone Primary Site into a hierarchy and supply the FQDN of the stand-alone Primary Site server.
Before starting the installation of the Central Administration Site the setup will check if the Primary Site has all the prerequisites in place. As you see below the perquisite checker will check, next to the default site checks, if the Endpoint Protection site role and the Asset intelligent synchronization point are removed.
After the installation is finished you will see some changes in the hierarchy, database replication has been setup and new default boot images are created at the Central Administration Site. What you need to do next is configure the Software Update Point and the Endpoint Protection site roles at the CAS. This way you are able to manage your Endpoint Protection clients again and be sure that your environment stays compliant with the latest (security) patches.
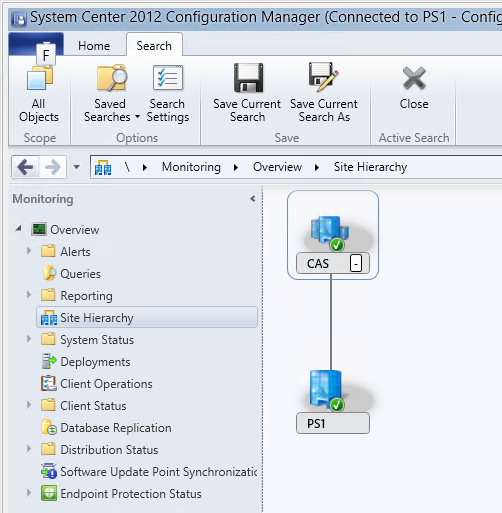
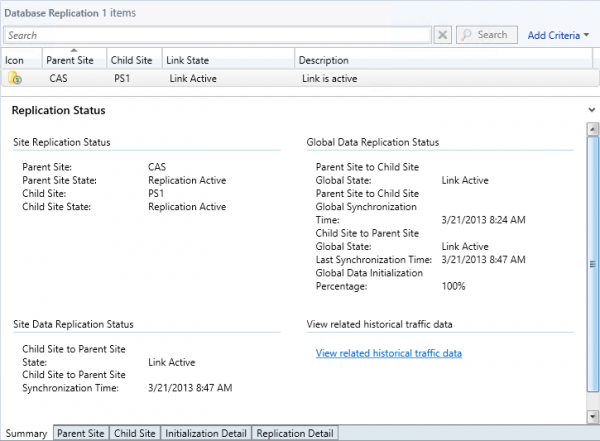
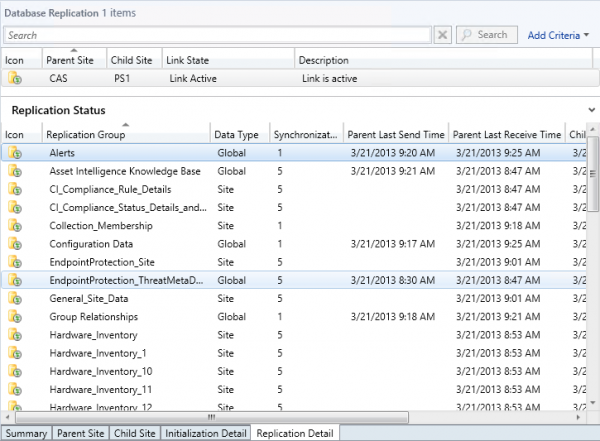
Use the Replication Link Analyzer to analyze and resolve issues with the replication between the CAS and Primary Sites. More on this in a later blog.
Read more in this serie of blogs:
- My top 10 new features of ConfigMgr 2012 SP1 – part 1, OSD enhancements
- My top 10 new features of ConfigMgr 2012 SP1 – part 2, Software Update Deployment
- My top 10 new features of ConfigMgr 2012 SP1 – part 3, checking status of Task Sequence deployment
- My top 10 new features of ConfigMgr 2012 SP1 – part 4, Test your domain join account
- My top 10 new features of ConfigMgr 2012 SP1 – part 5, Powershell support
- My top 10 new features of ConfigMgr 2012 SP1 – part 6, MAC OS-X support
- My top 10 new features of ConfigMgr 2012 SP1 – part 7, Mobile Device Management via Windows Intune


