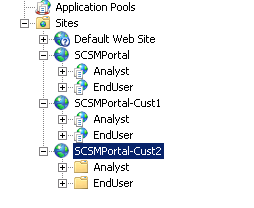
When playing around with the System Center Service Manager 2010 Self Service Portal, I wanted to create more portals on the same server. The basic steps of creating a secondary portal are well documented in several blogs around the Internet. But when following the steps a couple of trivial parts are missing. In this blog I will write down the complete steps to follow if you want to add one or more Self Service Portals to System Center Service Manager 2010 SP1.
- Install the SCSM 2010 SP1 Self Service Portal
- Copy the Self Service Portal source to another location on the IIS server
- Create a new website, point to the location where you copied the Self Service Portal source to, and assign the new website to the SM_AppPool Application Pool
- Change the authentication settings of the new website, when adding a new website “Anonymous Authentication” will be enabled by default. The preferred way is to disable “Anonymous Authentication” and to enable “Windows Authentication”.
- Assign a host-header, different port or dedicated IP address to the website.

When just adding the folder with the Self Service Portal source as the source of a new website the portal will not work and you will receive a .Net Application error. What you need to do is to add two applications (Analyst and EndUser) to the website.
- Add the Analyst application by right clicking on the new IIS Website and select Add Application
- Fill in the Alias Analyst and point to the folder where the Analyst source is residing.
- Do the same for the EndUser application
- You can now customize and re-brand the portals that suits your needs.
Important to know is that when updating SCSM 2010 SP1 to future service packs, the copying of the Self Service Portal Source to the different websites, re-branding and customizing must be done all over again.


